A fan of rich, creamy mac and cheese, then you’ll love the Yard House Mac & Cheese Recipe. As a food enthusiast, I couldn’t resist trying to recreate this iconic dish at home.
Today, I’m sharing my version of the Yard House Mac & Cheese Recipe. As someone who appreciates a great dish, I knew I had to recreate this popular recipe at home.
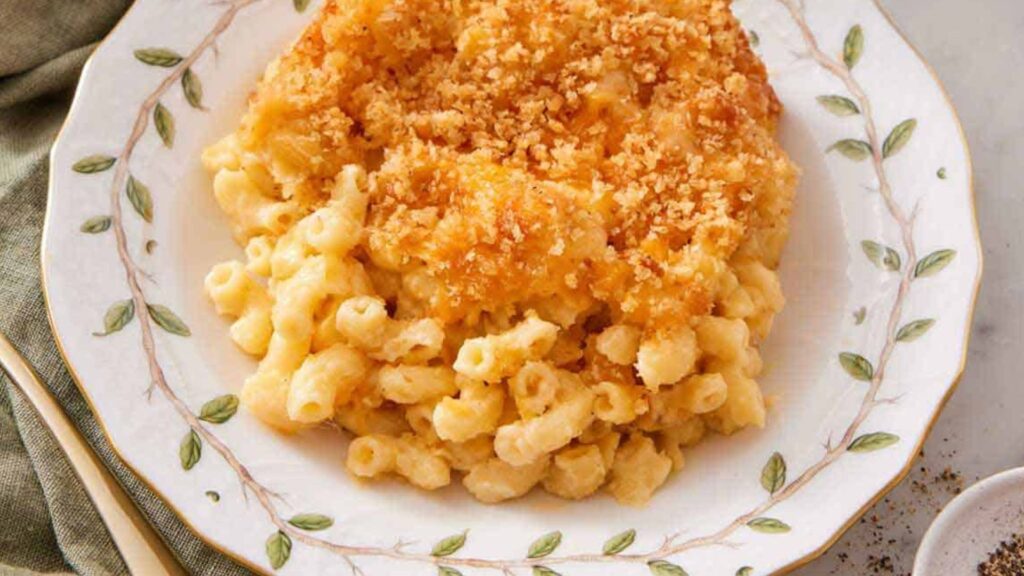
The combination of sharp cheddar, mozzarella, and Parmesan creates the ultimate cheesy experience. Plus, it’s super easy to make!
Re serving it as a side or a main dish, this mac and cheese will impress everyone. The best part? You don’t need to visit the restaurant to enjoy this indulgent comfort food.
I’ve perfected this recipe to bring the flavors of Yard House straight to your kitchen. Keep reading, and I’ll show you how to make the perfect Yard House Mac & Cheese Recipe.
Why You’ll Love This Recipe?
You’ll love this Yard House Mac & Cheese Recipe because it delivers the perfect balance of creamy, cheesy, and savory flavors in every bite.
The rich blend of sharp cheddar, mozzarella, and Parmesan creates a velvety sauce that coats the pasta beautifully, giving you that comforting, indulgent experience you crave.
It’s quick to make, taking just around 30 minutes from start to finish, and you don’t have to be a pro in the kitchen to master it.
Plus, this recipe is versatile—you can easily customize it with toppings like crispy bacon, sautéed mushrooms, or even a sprinkle of herbs for added flavor. Serving it as a side or main, this mac and cheese is sure to satisfy your cravings!
How To Prepare Yard House Mac & Cheese Recipe
Preparation Time: 10 minutes
Cooking Time: 20 minutes
Total Time: 30 minutes
Course: Main or Side Dish
Cuisine: American
Yield: 4 servings
Equipment Needed:
- Large pot for boiling pasta
- Medium saucepan for cheese sauce
- Baking dish (9×13-inch)
- Whisk
- Wooden spoon or spatula
- Measuring cups and spoons
- Oven for baking
Ingredients
Before diving into the step-by-step instructions, let’s gather the ingredients. Here’s everything you’ll need:
- 8 ounces elbow macaroni (or your preferred pasta)
- 2 tablespoons unsalted butter
- 2 tablespoons all-purpose flour
- 2 cups whole milk (or heavy cream for extra creaminess)
- 1 cup shredded sharp cheddar cheese
- 1/2 cup shredded mozzarella cheese
- 1/4 cup grated Parmesan cheese
- 1 teaspoon Dijon mustard (optional, for extra flavor)
- Salt and black pepper to taste
- 1/2 teaspoon garlic powder
- 1/2 teaspoon onion powder
- 1/4 teaspoon smoked paprika (optional, for added depth)
- 1/2 cup panko breadcrumbs (for the topping)
- Fresh parsley (optional, for garnish)
Directions
Step 1: Cook the Pasta
Start by bringing a large pot of salted water to a boil. Add the elbow macaroni and cook according to the package instructions (usually around 10-20 minutes). Once cooked, drain the pasta and set it aside.
Step 2: Make the Cheese Sauce
While the pasta is cooking, melt the butter in a medium saucepan over medium heat. Once the butter has melted, add the flour to create a roux.
Stir constantly for about 8-10 minutes until the mixture turns golden and bubbly, ensuring it doesn’t burn.
Slowly pour in the milk (or cream), whisking constantly to avoid lumps. Continue whisking until the mixture thickens and begins to simmer. This usually takes about 15-20 minutes.
Step 3: Add the Cheeses
Once the sauce has thickened, reduce the heat to low and start adding the cheeses. First, add the sharp cheddar, followed by the mozzarella, and then the Parmesan. Stir until everything is melted and smooth.
At this point, add the Dijon mustard (if using), garlic powder, onion powder, smoked paprika, and salt and pepper to taste. The sauce should be velvety and rich.
Step 4: Combine Pasta and Sauce
Add the cooked pasta to the saucepan with the cheese sauce. Stir until every piece of pasta is coated with that luscious sauce.
Step 5: (Optional) Bake the Mac & Cheese
For an extra crispy, golden topping, transfer the mac and cheese into a baking dish. Sprinkle the top with panko breadcrumbs and bake in a preheated oven at 350°F (175°C) for about 30 minutes, or until the breadcrumbs are golden and crispy.
Step 6: Garnish and Serve
If you’re not baking the mac and cheese, simply serve it hot from the stovetop. Garnish with freshly chopped parsley for a pop of color and serve immediately.
Special Note
1. Cheese Variations: Feel free to experiment with different cheeses like Gruyère or Fontina for a deeper flavor.This recipe is incredibly versatile.
If you want to make it even more decadent, you can swap the milk for heavy cream to create an extra creamy sauce.
2. Add-ins: To make this dish even heartier, add cooked bacon, grilled chicken, or roasted vegetables.Feel free to add cooked bacon, sautéed mushrooms, or even lobster to elevate this dish and make it your own.
3. Spice It Up: For a little kick, toss in some red pepper flakes or diced jalapeños.However, the golden, crispy topping really does take it to the next level, so I highly recommend giving it a try when you have the time.
Nutrition Facts Yard House Mac & Cheese Recipe
Calories: 550
Protein: 18g
Fat: 27g
Carbohydrates: 55g
Fiber: 2g
Sugar: 7g
Sodium: 550mg
Serving Suggestions
This Yard House Mac & Cheese Recipe is a versatile dish that pairs well with so many sides and toppings. For a complete meal, serve it alongside a crisp green salad with a tangy vinaigrette to balance out the richness of the cheese.
If you’re looking for extra protein, try adding grilled chicken, crispy bacon, or even sautéed shrimp for an elevated twist.
For a fun variation, you can bake the mac and cheese with a golden, buttery breadcrumb topping for added crunch.
It also works wonderfully as a side dish to complement main courses like steak, roasted vegetables, or barbecued meats. No matter how you serve it, this mac and cheese will be the star of your meal!
Tips And Techniques
Here are 5 tips and techniques to make your Yard House Mac & Cheese even better:
1. Use Freshly Grated Cheese: Pre-shredded cheese can have anti-caking agents that affect the texture of your sauce. Freshly grated cheese melts smoother and creates a creamier sauce.
2. Don’t Overcook the Pasta: Make sure to cook your pasta al dente, as it will continue to cook a bit when mixed with the sauce. Overcooking can lead to mushy mac and cheese.
3. Make It Extra Creamy: For a super rich sauce, substitute half of the milk with heavy cream or add a bit of cream cheese for added creaminess and tang.
4. Season to Taste: Adjust the salt, pepper, and spices to suit your preferences. A pinch of cayenne pepper or hot sauce can add a fun kick!
5. Baking for a Crunchy Topping: For a golden, crispy top, sprinkle panko breadcrumbs mixed with melted butter over the mac and cheese and bake for about 10 minutes. This adds a satisfying crunch!
Storages Information
Have leftovers, storing your Yard House Mac & Cheese Recipe is simple. Let the mac and cheese cool to room temperature before transferring it to an airtight container.It will keep in the refrigerator for 3-4 days.
To reheat, you can use the microwave, but for the best texture, I recommend reheating it on the stove over low heat with a splash of milk or cream to restore its creamy consistency.
If you’d like to freeze it, portion it into freezer-safe containers, and it will last for up to 2-3 months.
When ready to enjoy, thaw it overnight in the refrigerator and reheat gently on the stove. The flavors may even intensify after storing, making it even more delicious!
What Is The Trick To Keeping Yard House Mac & Cheese Creamy?
The key to keeping Yard House Mac & Cheese Recipe creamy is making sure your sauce doesn’t overheat and become too thick. Gradually add the milk to the roux and whisk continuously to avoid clumping.
If the sauce becomes too thick, add a bit more milk or cream to loosen it up.
Using full-fat dairy, such as whole milk and heavy cream, ensures a rich, smooth texture. For extra creaminess, you can also stir in a bit of cream cheese or sour cream.
What To Add To Macaroni And Cheese To Make It Taste Better?
To take your mac and cheese to the next level, try adding spices like smoked paprika, cayenne pepper, or a dash of mustard powder for depth.
A sprinkle of garlic powder or fresh herbs, such as thyme or rosemary, can enhance the flavor profile. You can also mix in cooked bacon, caramelized onions, or sautéed mushrooms for a savory twist.
Is Yard House Mac And Cheese Vegetarian-Friendly?
Yes, Yard House Mac & Cheese Recipe can easily be vegetarian-friendly. The dish typically features a creamy cheese sauce made from milk and butter, and the pasta itself is plant-based.
However, if you want to make sure it’s fully vegetarian, be mindful of any toppings or mix-ins, like bacon or meat, that might be added. For a completely vegetarian version, simply omit those meat-based additions.
Can I Use Different Types Of Pasta For This Recipe?
Absolutely! While elbow macaroni is traditional, you can swap it out for any pasta shape you prefer. Penne, fusilli, or cavatappi work beautifully in mac and cheese because their shapes hold the sauce well. Just make sure to cook the pasta al dente, as it will absorb some sauce while baking or reheating.
Can I Omit The Bacon For A Vegetarian Version?
Yes, you can easily omit the bacon to make this mac and cheese vegetarian. The dish will still be rich and flavorful thanks to the cheese sauce.
If you want to add extra flavor, consider using roasted vegetables, sautéed onions, or even a sprinkle of nutritional yeast to enhance the savory taste.
Is It Possible To Make Yard House Mac And Cheese Gluten-Free?
Yes, you can make Yard House Mac & Cheese Recipe gluten-free by using gluten-free pasta and ensuring your other ingredients are gluten-free as well.
Be sure to check the labels on the cheese and any additional toppings to ensure they don’t contain gluten. This way, you can still enjoy a delicious, creamy mac and cheese without worrying about gluten.
Can I Use Pre-Shredded Cheese Instead Of Grating It Myself?
While you can use pre-shredded cheese, it’s not ideal. Pre-shredded cheese contains anti-caking agents that can affect the smoothness of the sauce.
For the creamiest texture, it’s best to shred your own cheese. This helps the cheese melt more evenly and creates a silkier sauce.
What Can I Substitute For Gorgonzola Cheese If I Don’t Have It?
If you don’t have Gorgonzola cheese, you can substitute with other blue cheeses like Roquefort or Stilton for a similar tangy, sharp flavor.
If you prefer a milder taste, try using goat cheese or a sharp cheddar as an alternative. The goal is to add a cheese with a bold flavor that complements the creamy sauce.
Conclusion
This Yard House Mac & Cheese Recipe House-inspired is truly a treat for cheese lovers. It’s creamy, cheesy, and full of flavor, making it perfect for any occasion.
To wrap things up, this Yard House Mac & Cheese Recipe brings all the creamy, cheesy goodness straight to your kitchen.
It’s simple to make yet packed with flavor, offering a rich, velvety sauce that will have everyone coming back for more. Enjoying it as a side or making it the star of the meal, this dish is a crowd-pleaser.
The best part is, you can easily customize it with your favorite mix-ins or toppings. I truly hope you give this recipe a try—it’s a comforting, indulgent treat that’s hard to resist.
If you have any tips or variations, feel free to share in the comments. I’d love to hear how your homemade mac and cheese turns out!

Hi, I’m Delina, a housewife, mother of two living in the suburbs of Vancouver, Canada. I’m a professional recipe developer and food photographer behind thefoodscraft.com. Although I was trained in biological technology for lab work, my heart is in the kitchen. Growing up, family dinners were a nightly tradition, and as a single mom of two, I was determined to keep that alive. With limited ingredients, I discovered the magic of transforming basic items into cozy family meals, which inspires all my recipes. In 2017, I started thefoodscraft.com, sharing budget-friendly recipes and tips.