Whenever I walk into Starbucks, I can’t resist grabbing something sweet with my coffee. Those tiny treats always catch my eye. After countless indulgent moments, I finally challenged myself to recreate them at home.
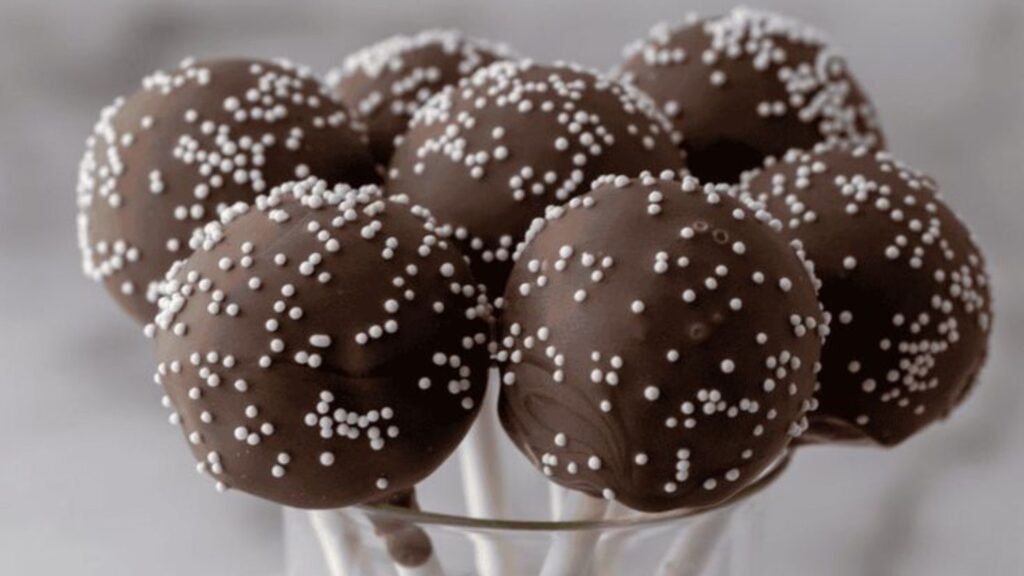
Around the tenth try, I cracked the code for the perfect Chocolate Cake Pop Starbucks Recipe. The texture is rich, the flavor is deep, and the coating has that same perfect snap.
I love making these for parties, gifts, or just to enjoy with a cup of coffee. They’re simple, fun, and absolutely delicious. a fan like me, this recipe is a must-try.
Why Everyone Will Love It?
Everyone will love this recipe because it brings together everything people crave in a treat—rich chocolate flavor, a moist, fudgy center, and a smooth, sweet coating.
It’s bite-sized, fun to eat, and looks like it came straight from a bakery. Whether it’s for kids, coffee lovers, or anyone with a sweet tooth, this Chocolate Cake Pop Starbucks Recipe hits the spot every time.
How To Prepare Chocolate Cake Pop Starbucks Recipe
Prep Time: 25 minutes
Cook Time: 35 minutes
Chill Time: 15 minutes
Total Time: 1 hour 15 minutes
Course: Dessert
Cuisine: American
Difficulty: Easy
Yield: 24 cake pops
Kitchen Utensils
To make these delectable cake pops, gather the following equipment:
- Mixing bowls
- Measuring spoons and cups
- Hand mixer or whisk
- Baking pan (9×13-inch)
- Spatula
- Cake pop sticks
- Microwave-safe bowl or double boiler
- Styrofoam block or cake pop stand
Ingredients
For the chocolate cake:
- 1 cup (120g) all-purpose flour
- ¼ cup (27g) unsweetened cocoa powder
- ½ teaspoon baking powder
- ¼ teaspoon baking soda
- ¼ teaspoon salt
- ½ cup (100g) granulated sugar
- ¼ cup (60ml) vegetable oil
- 1 teaspoon vanilla extract
- ¼ cup (60ml) milk
- 1 large egg
- ¼ cup (60ml) hot water
For the frosting:
- ½ cup (115g) unsalted butter, softened
- 1 cup (120g) powdered sugar
- 1½ tablespoons cocoa powder
- ½ teaspoon vanilla extract
- Pinch of salt
- Splash of milk (start with 1 teaspoon, add more if needed)
For the coating:
- 12 oz (340g) dark chocolate candy melts
- White nonpareil sprinkles
Step-By-Step Directions
1. Bake the Chocolate Cake
Preheat your oven to 350°F (175°C). Grease and flour a 9×13-inch baking pan.
In a large bowl, whisk together flour, cocoa powder, baking powder, baking soda, and salt.
In another bowl, beat together sugar, oil, vanilla extract, milk, and egg until smooth.
Gradually add the dry ingredients to the wet ingredients, mixing until combined.
Stir in the hot water until the batter is smooth.
Pour the batter into the prepared pan and bake for 30–35 minutes, or until a toothpick inserted into the center comes out clean.
Allow the cake to cool completely in the pan on a wire rack.
2. Prepare the Frosting
In a medium bowl, beat the softened butter until creamy.
Gradually add powdered sugar, cocoa powder, vanilla extract, and salt, beating until smooth.
Add milk, a little at a time, until the frosting reaches a smooth, moldable consistency.
3. Form the Cake Pops
Once the cake has cooled, crumble it into fine crumbs using your hands or a fork.
Place the cake crumbs in a large bowl and add the prepared frosting. Mix until the mixture holds together when pressed.
Roll the mixture into 1-inch balls and set them aside on a baking sheet lined with parchment paper.
4. Coat the Cake Pops
Melt the dark chocolate candy melts according to the package instructions, either in a microwave-safe bowl or using a double boiler.
Dip one end of each cake pop stick into the melted chocolate, then insert it into the center of each cake ball to help secure the stick.
Dip each cake pop into the melted chocolate, covering it completely. Tap the stick gently to remove excess chocolate.
While the chocolate is still wet, sprinkle with white nonpareils.
Place the coated cake pops upright in a styrofoam block or cake pop stand to dry and set.
Special Note
Don’t skip chilling the cake balls before dipping—it makes all the difference. If you dip them too warm, they might fall off the stick or melt into the chocolate.
And if you want to experiment, try using white chocolate or colored candy melts for a festive twist.
Nutrition Facts Chocolate Cake Pop Starbucks Recipe
Calories: Approximately 170
Fat: 8g
Carbohydrates: 23g
Protein: 2g
Sugar: 17g
Saturated Fat: 4g
Fiber: 1g
Serving Suggestions
I love serving these Chocolate Cake Pop Starbucks Recipe chilled, right out of the fridge—they hold their shape perfectly and the coating has a nice snap.
For parties, I arrange them in a decorative stand or wrap them in clear treat bags with ribbons.
If I’m having coffee with friends, I serve them on a plate alongside espresso or hot cocoa. This Chocolate Cake Pop Starbucks Recipe also makes a fun and thoughtful edible gift.
Tips And Variations
1. Chill Before Dipping: I always chill the cake balls in the fridge for at least 15–20 minutes before dipping. It keeps them firm and helps the chocolate set quickly.
2. Use Different Coatings: Switch things up by using white chocolate, milk chocolate, or colorful candy melts. I sometimes add a drop of food coloring to match holiday themes.
3. Add a Flavor Twist: A splash of peppermint, almond, or hazelnut extract in the frosting gives a fun twist to the classic Chocolate Cake Pop Starbucks Recipe.
4. Decorate Creatively: I top mine with sprinkles, crushed nuts, or even edible glitter when I want to impress at gatherings.
5. Try Different Cake Bases: While chocolate is a classic, I’ve also used red velvet, vanilla, and even brownie mix. Each version brings its own charm and flavor.
Health Benefits
While cake pops are a sweet indulgence, making them at home gives me control over the ingredients.
I can reduce the sugar, use high-quality dark chocolate, and even swap in whole wheat flour for added fiber. Dark chocolate also offers antioxidants and a small mood boost, which I always appreciate.
With this homemade Chocolate Cake Pop Starbucks Recipe, I get to enjoy a satisfying treat in moderation, without any mystery ingredients.
What Makes Starbucks Cake Pops So Good?
Starbucks cake pops are loved for their soft, fudgy center and perfectly smooth chocolate shell. Each bite offers a balanced sweetness and rich texture that melts in your mouth.
They’re also beautifully decorated and portioned, making them the perfect quick treat. The combination of flavor, texture, and presentation is what really sets them apart.
What Is The Best Chocolate For Making Cake Pops?
I always go for high-quality candy melts or couverture chocolate when making cake pops.
Candy melts are easy to work with and give a smooth finish, while couverture chocolate adds a richer, more decadent taste. For the best results, choose chocolate with good cocoa content and a glossy finish after melting.
Which Flavour Is Best In Chocolate Cake?
For me, adding a hint of espresso or vanilla takes chocolate cake to the next level. Espresso enhances the deep cocoa flavor without making it taste like coffee.
If you prefer something more subtle, a touch of almond or orange extract also pairs beautifully with chocolate.
How To Get Cake Pops Smooth?
To get that smooth, professional finish, I chill the cake balls before dipping and make sure the chocolate coating is warm, but not too hot.
I dip each ball in one fluid motion, tap gently to remove excess, and rotate slightly for even coverage. Using good-quality chocolate or candy melts helps, too.
How Much Are Cake Pops At Starbucks?
Starbucks cake pops usually cost between $2.25 to $2.75 each, depending on your location.
Prices can vary slightly by store and region, especially with seasonal or specialty designs. Making them at home definitely saves money in the long run.
How Long Do Cake Pops Last?
Homemade cake pops last up to one week when stored in an airtight container at room temperature. If I refrigerate them, they can stay fresh for up to two weeks.
For longer storage, I freeze them—just wrap individually and thaw when ready to enjoy.
How To Make Cake Pops With Leftover Cake?
Leftover cake is perfect for cake pops. I crumble it into fine pieces, mix it with a little frosting until it holds together, then roll it into balls.
From there, I chill, dip, and decorate just like a regular recipe. It’s a fun way to reduce waste and make something new.
Conclusion
Recreating the Chocolate Cake Pop Starbucks Recipe at home has been one of my favorite kitchen adventures.
It’s fun, simple, and incredibly satisfying to make a treat that tastes just like the one from the coffee shop—maybe even better. I love having full control over the ingredients, flavor, and presentation.
These cake pops make perfect gifts, party treats, or personal indulgences with a hot drink. If you’re like me and enjoy sweet, bite-sized desserts, you’ll fall in love with this recipe.
Once you make a batch, you’ll see just how easy and enjoyable it is to bring Starbucks home. It’s a fun way to get creative in the kitchen and impress friends or treat yourself.
Once you try it, you might never need to buy one again. I know I don’t. Give it a go—you’ll taste the love in every bite.

Hi, I’m Delina, a housewife, mother of two living in the suburbs of Vancouver, Canada. I’m a professional recipe developer and food photographer behind thefoodscraft.com. Although I was trained in biological technology for lab work, my heart is in the kitchen. Growing up, family dinners were a nightly tradition, and as a single mom of two, I was determined to keep that alive. With limited ingredients, I discovered the magic of transforming basic items into cozy family meals, which inspires all my recipes. In 2017, I started thefoodscraft.com, sharing budget-friendly recipes and tips.