This Low Sodium Bread Recipe. I focus on wholesome ingredients and simple cooking. Bread is a big part of my daily meals, so I needed a healthier option.
Store-bought loaves often contain way too much salt. That’s when I started experimenting in my kitchen. After several tries, I finally found what works best.
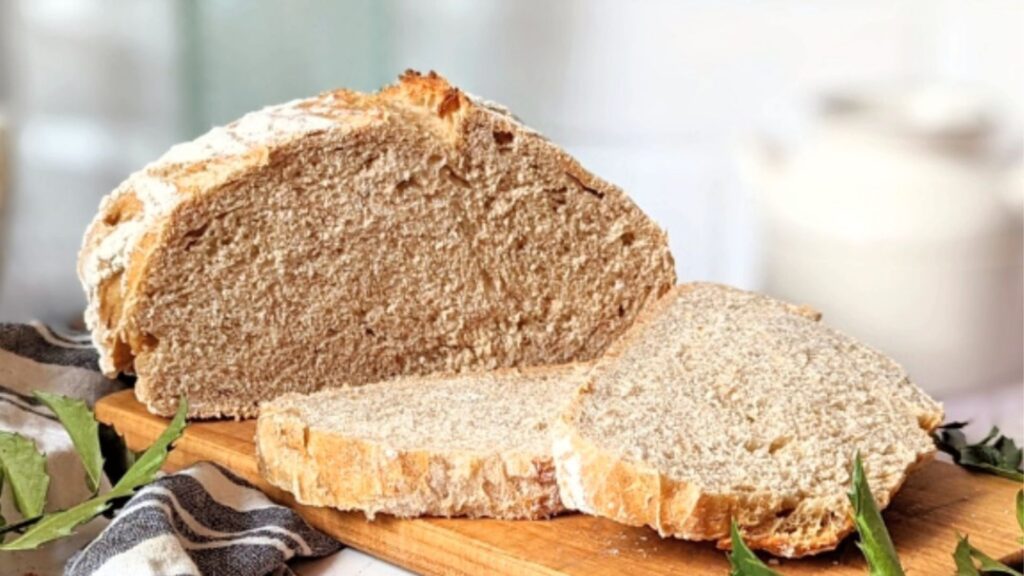
This low sodium bread recipe gives me full control over flavor and nutrition. It’s soft, hearty, and doesn’t taste bland.
I use it for everything—from morning toast to sandwiches. If you want a heart-smart option, this recipe is a great place to start.
What Does Low Sodium Bread Recipe Taste Like?
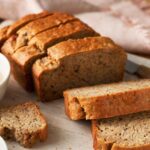
This low sodium bread recipe has a mild, slightly nutty flavor with a soft, chewy texture. Without the overpowering salt, the natural taste of the flour and any added herbs or sweeteners really stands out.
It doesn’t taste bland—it just tastes clean and wholesome. I often notice a subtle sweetness, especially when I add a touch of honey or olive oil. It’s perfect for toast, sandwiches, or enjoying plain with a bit of butter or avocado.
How To Prepare Low Sodium Bread Recipe
Recipe Overview
Prep Time: 15 minutes
Cook Time: 30 minutes
Rise Time: 1.5 hours
Total Time: 2 hours 15 minutes
Course: Bread
Cuisine: American
Difficulty: Easy
Yield: 1 loaf (12 slices)
Kitchen Utensils
- Large mixing bowl
- Loaf pan (8.5 x 4.5 inches)
- Measuring cups and spoons
- Kitchen towel or plastic wrap
- Oven
- Cooling rack
Ingredients
- 3 cups whole wheat or all-purpose flour
- 2¼ teaspoons active dry yeast (1 packet)
- 1¼ cups warm water (110°F or 45°C)
- 1 tablespoon olive oil (optional, for added moisture)
- 1 tablespoon honey or sugar (optional, for a touch of sweetness)
- 1 teaspoon garlic powder (optional, as a salt substitute)
Step-By-Step Directions
1. Activate the Yeast
In a large mixing bowl, combine the warm water, honey or sugar, and active dry yeast. Stir gently and let it sit for about 5 minutes, or until the mixture becomes frothy. This step ensures that the yeast is active and ready to help the dough rise.
2. Mix the Dough
Add the flour and garlic powder (if using) to the yeast mixture. Stir with a wooden spoon or spatula until a sticky dough forms.
3. Knead the Dough
Transfer the dough onto a lightly floured surface. Knead for about 8-10 minutes, or until the dough is smooth and elastic. If the dough is too sticky, sprinkle a little more flour as needed.
4. First Rise
Place the kneaded dough into a lightly greased bowl. Cover with a kitchen towel or plastic wrap and let it rise in a warm place for 1 to 1.5 hours, or until it doubles in size.
5. Shape the Dough
Punch down the risen dough to release any air bubbles. Turn it out onto a floured surface and shape it into a loaf.
6. Second Rise
Place the shaped dough into a greased loaf pan. Cover and let it rise for another 30-45 minutes, or until it has risen above the edges of the pan.
7. Bake the Bread
Preheat your oven to 375°F (190°C). Bake the loaf for 25-30 minutes, or until the top is golden brown and the bread sounds hollow when tapped on the bottom.
8. Cool and Slice
Remove the bread from the oven and let it cool in the pan for a few minutes. Then, transfer it to a wire rack to cool completely before slicing.
Special Notes
1. Watch the water temperature: If the water is too hot, it can kill the yeast. I always aim for warm—not hot—water, around 110°F. This helps the dough rise properly.
2. Let it cool completely: I never slice the bread while it’s still warm. Cutting too soon can make it gummy inside. Letting it cool gives a clean, even slice and better texture.
Nutrition Facts Low Sodium Bread Recipe
Calories: 120 kcal
Total Fat: 1.8 g
Saturated Fa: 0.2 g
Carbohydrates: 23 g
Dietary Fiber: 2 g
Sugars: 1.3 g
Protein: 4 g
Sodium: 0 mg
Calcium: 74 mg
Iron: 74 mg
Amazing Serving Ideas
I love how versatile this low sodium bread recipe is when it comes to serving. For breakfast, I toast a slice and top it with mashed avocado, a poached egg, or unsalted nut butter.
At lunch, it makes a great base for hearty sandwiches with grilled chicken, hummus, or roasted veggies. Sometimes I cut it into cubes and bake them into crunchy croutons for salads.
It even works beautifully as a side with homemade soups or stews. This bread fits into any meal without overpowering the flavors.
Tips For Perfect Low Sodium Bread Recipe
1. Use fresh yeast – I always check the expiration date. Old yeast won’t rise well, and the bread can turn out dense.
2. Add flavor with herbs or garlic powder – Since salt is minimal, I often use garlic, rosemary, or onion powder to boost the taste.
3. Don’t skip the second rise – I let the dough rise twice. It gives the bread better texture, shape, and softness.
4. Use bread flour for more structure – When I want a chewier loaf, I swap some all-purpose flour with bread flour.
5. Store it properly – I wrap my cooled loaf in a clean towel or keep it in an airtight container to stay fresh longer.
Essential Health Benefits
This low sodium bread recipe offers several important health benefits. By cutting out excess salt, I help support my heart health and maintain healthy blood pressure levels.
Using whole grains boosts fiber, which aids digestion and keeps me feeling full longer. When I bake it myself, I avoid preservatives and additives found in store-bought loaves.
I also get to control the ingredients, adding healthy fats like olive oil or nutrient-rich seeds if I want. It’s a simple way to eat cleaner without giving up the comfort of fresh, homemade bread.
What Type Of Bread Is Lowest In Sodium?
The bread with the lowest sodium is usually homemade, especially when I leave out the salt or use low-sodium ingredients. Among store-bought options, salt-free or “no salt added” whole wheat breads are typically the lowest.
I also find that sprouted grain breads and some gluten-free loaves often have less sodium, depending on the brand. Always reading the label helps me make the best choice.
How Do You Reduce Sodium In Bread?
To reduce sodium in bread, I simply cut back or completely eliminate the salt from the recipe. I replace salt with herbs, garlic powder, or onion powder for flavor. Using unsalted butter or low-sodium baking ingredients also helps.
When baking with yeast, I make sure to balance flavor and texture carefully—sometimes just ¼ teaspoon of salt is enough to maintain structure without adding too much sodium.
Can I Have Bread On A Low-Sodium Diet?
Yes, I can definitely have bread on a low-sodium diet—as long as I choose wisely. I either bake my own or look for brands labeled “low sodium” or “no salt added.”
Portion control also matters, so I stick to one or two slices at a time. Pairing it with fresh, low-sodium toppings keeps the whole meal heart-healthy and satisfying.
Conclusion
Baking my own bread changed the way I think about healthy eating. I know exactly what goes into each loaf, and I never have to worry about hidden salt.
This low sodium bread recipe fits perfectly into my lifestyle. It’s simple, satisfying, and kind to my heart. Looking to cut back on sodium without giving up flavor or texture, I truly recommend giving this recipe a try.
With just a few ingredients and a little time, you’ll have fresh, wholesome bread made right in your kitchen. Once you taste it, you might not go back to store-bought again.
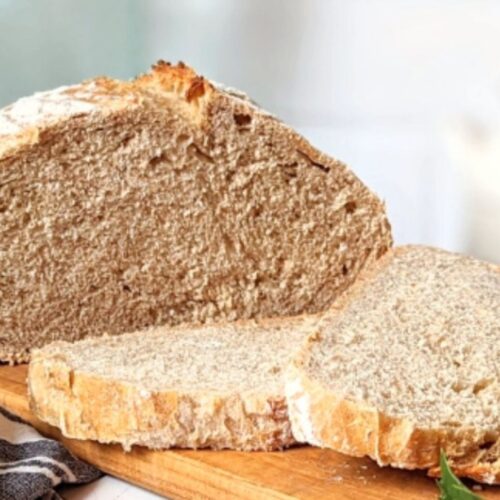
Low Sodium Bread Recipe
Equipment
- Large mixing bowl
- Loaf pan (8.5 x 4.5 inches)
- Measuring cups and spoons
- Kitchen towel or plastic wrap
- Oven
- Cooling rack
Ingredients
- 3 cups whole wheat or all-purpose flour
- 2¼ teaspoons active dry yeast 1 packet
- 1¼ cups warm water 110°F or 45°C
- 1 tablespoon olive oil optional, for added moisture
- 1 tablespoon honey or sugar optional, for a touch of sweetness
- 1 teaspoon garlic powder optional, as a salt substitute
Instructions
Activate the Yeast
- In a large mixing bowl, combine the warm water, honey or sugar, and active dry yeast. Stir gently and let it sit for about 5 minutes, or until the mixture becomes frothy. This step ensures that the yeast is active and ready to help the dough rise.
Mix the Dough
- Add the flour and garlic powder (if using) to the yeast mixture. Stir with a wooden spoon or spatula until a sticky dough forms.
Knead the Dough
- Transfer the dough onto a lightly floured surface. Knead for about 8-10 minutes, or until the dough is smooth and elastic. If the dough is too sticky, sprinkle a little more flour as needed.
First Rise
- Place the kneaded dough into a lightly greased bowl. Cover with a kitchen towel or plastic wrap and let it rise in a warm place for 1 to 1.5 hours, or until it doubles in size.
Shape the Dough
- Punch down the risen dough to release any air bubbles. Turn it out onto a floured surface and shape it into a loaf.
Second Rise
- Place the shaped dough into a greased loaf pan. Cover and let it rise for another 30-45 minutes, or until it has risen above the edges of the pan.
Bake the Bread
- Preheat your oven to 375°F (190°C). Bake the loaf for 25-30 minutes, or until the top is golden brown and the bread sounds hollow when tapped on the bottom.
Cool and Slice
- Remove the bread from the oven and let it cool in the pan for a few minutes. Then, transfer it to a wire rack to cool completely before slicing.
Notes

Hi, I’m Delina, a housewife, mother of two living in the suburbs of Vancouver, Canada. I’m a professional recipe developer and food photographer behind thefoodscraft.com. Although I was trained in biological technology for lab work, my heart is in the kitchen. Growing up, family dinners were a nightly tradition, and as a single mom of two, I was determined to keep that alive. With limited ingredients, I discovered the magic of transforming basic items into cozy family meals, which inspires all my recipes. In 2017, I started thefoodscraft.com, sharing budget-friendly recipes and tips.